Within the Digital Asset Marketplace extension for WooCommerce, you have the flexibility to implement a cheque printing function. While the provision of cheque withdrawals to your clients is entirely optional, it can be a valuable feature for those who prefer traditional payment methods. In this example, we will guide you through the development of a function designed to print cheques using a local printer.
As with the bank transfer method, the accessibility of this cheque printing function will be restricted to authorized requests. Access is granted only after undergoing an integrated balance verification process against the internal ledger maintained by the plugin. This stringent internal control ensures that cheque printing remains a secure and validated transaction method within your marketplace.
By offering this optional feature, you can provide your clients with a versatile array of payment options, while maintaining the highest standards of security and accuracy in your financial operations.
Prerequisites
Before you start, make sure you have the necessary components set up:
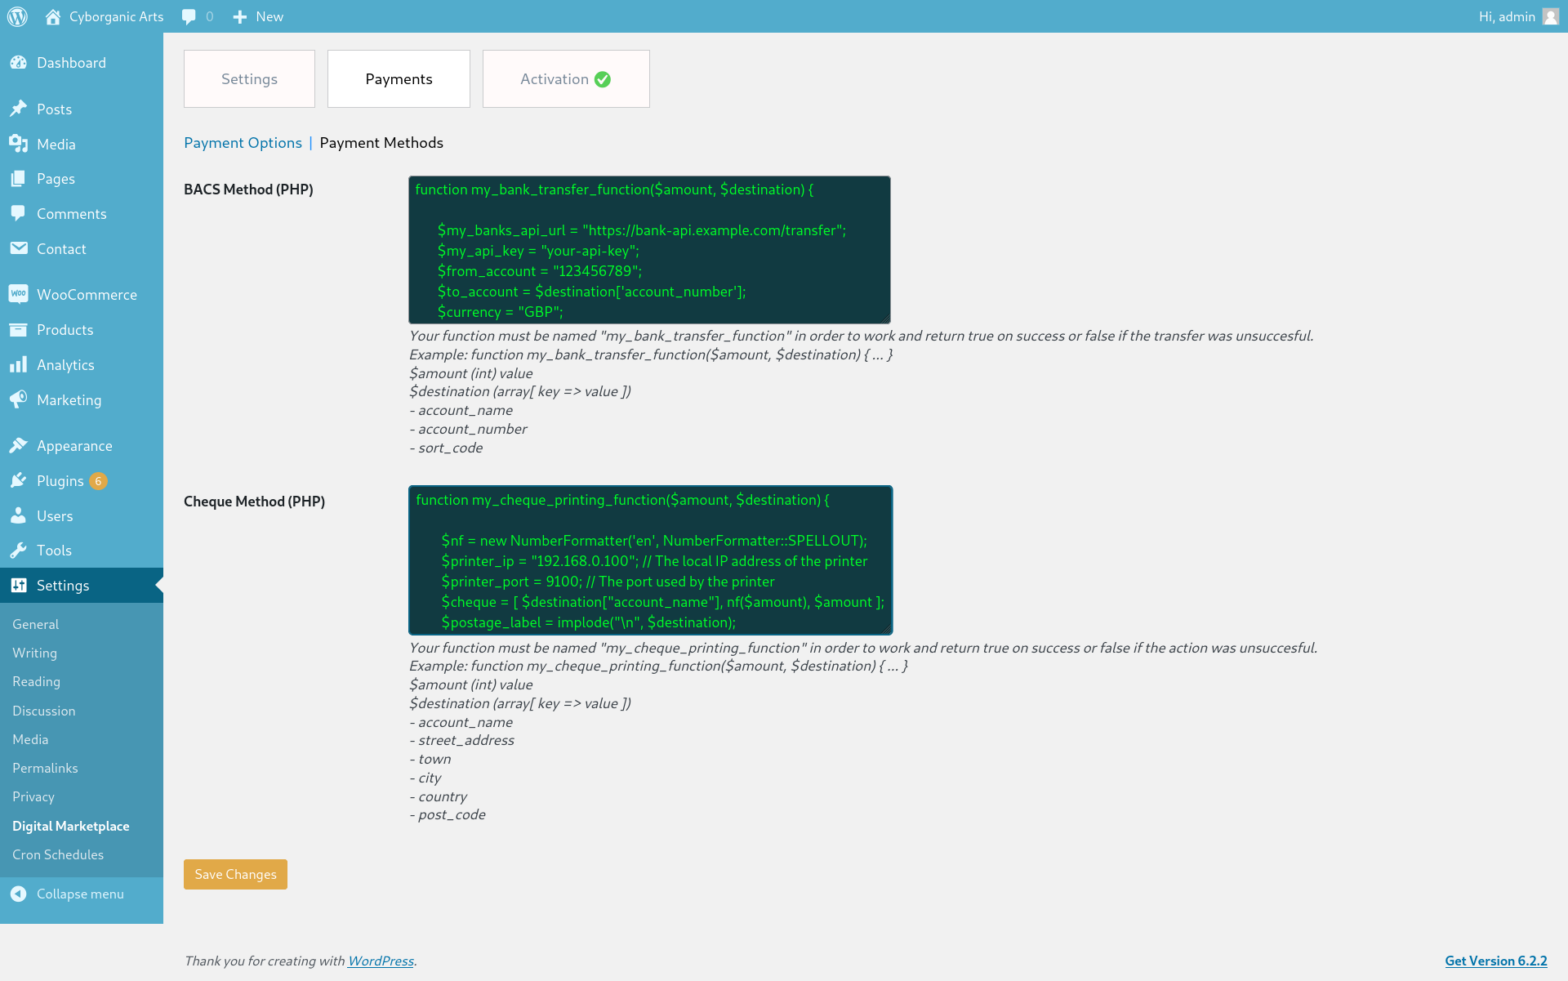
Printer Setup: Ensure your printer is set up correctly and accessible from your server. You’ll need the printer’s IP address and port number.
Function Overview
Here’s an overview of what our custom cheque printing function will do:
- Accept the cheque amount and destination details as parameters ($amount, $destination).
- Convert the amount to words using the NumberFormatter class.
- Prepare the cheque content and destination address.
- Send the cheque to the printer.
Example
Update the printer configuration to reflect the actual values of your local printers network information and adjust the code according to your specific requirements.
   function my_cheque_printing_function($amount, $destination) {

      // Create a NumberFormatter to spell out the amount
      $nf = new NumberFormatter('en', NumberFormatter::SPELLOUT);

      // Printer configuration
      $printer_ip = "192.168.0.100"; // The local IP address of the printer
      $printer_port = 9100; // The port used by the printer

      // Prepare cheque content
      $chequeContent = [
         "Pay to: " . $destination["account_name"],
         "Amount in words: " . ucfirst($nf->format($amount)),
         "Amount: £" . number_format($amount, 2),
      ];

      // Prepare the destination address
      $address = [
         "Name: " . $destination["account_name"],
         "Street Address: " . $destination["street_address"],
         "Town: " . $destination["town"],
         "City: " . $destination["city"],
         "Country: " . $destination["country"],
         "Post Code: " . $destination["post_code"],
      ];

      // Combine cheque content and address with a single line break
      $chequeText = implode("\n", $chequeContent) . "\n" . implode("\n", $address);

      // Open a socket connection to the printer
      $printer = socket_create(AF_INET, SOCK_STREAM, SOL_TCP);

      if (!$printer) {
         return false; // Failed to create a socket connection
      }

      // Connect to the printer
      if (!socket_connect($printer, $printer_ip, $printer_port)) {
         // Failed to connect to the printer
         socket_close($printer);
         return false;
      }

      // Send the cheque data to the printer socket
      $transferData = socket_write($printer, $chequeText, strlen($chequeText));

      // Check the return value of socket_write
      if ($transferData === false) {
         // Failed to write data to the printer socket
         socket_close($printer);
         // Returning false will not affect the clients virtual ledger
         return false;
      } else {
         // Successfully wrote $transferData bytes to the printer socket
         socket_close($printer);
         // Returning true will deduct the amount from the clients virtual ledger
         return true;
      }

   }
This basic example provides a starting point for creating your own function. It’s essential to use the function name and variables my_cheque_printing_function($amount, $destination), preceded with the function keyword, as shown in the example. However, there are a few important things to consider to make sure your code is reliable and can handle potential issues:
- Printer Protocols: The code above uses a TCP socket connection to send data to the printer. This is a common method for network devices and should work for most printers. However, it’s essential to consider the specific printer you intend to use. Some printers might use different protocols, such as LPD (Line Printer Daemon) or IPP (Internet Printing Protocol). You should check the printer’s documentation for compatibility with the protocol you’re using.
- Printer Status: To address issues like having no ink or paper, you can’t directly check these conditions through the socket connection. Printers typically have SNMP (Simple Network Management Protocol) capabilities that allow you to query their status. However, this would require a different approach, and you’d need to integrate SNMP functionality into your code. Some printers may not require you to check the status before submitting a task, it’s important to review your printers capabilities by referring to the documentation provided by the manufacturer.
- Queuing and Logging: To prevent cheque loss due to printer errors, you may wish to implement a queuing system. Instead of sending the cheque directly to the printer, you could add it to a queue. A separate process could then monitor the queue and handle the printing, providing additional error handling and status checking. Additionally, logging each print job and its status can help you track and diagnose issues. Some printers may have these features built-in to the firmware but they are still important considerations to review.
- Fallback Mechanism: Consider implementing a fallback mechanism. If a print job fails, you may want to notify the user and an administrator to offer alternatives like exporting the cheque as a PDF for manual printing or prompting a printer maintenance inspection.
- Testing: Thoroughly test your code with your specific printer model and troubleshoot all possible scenarios to identify potential issues and improve reliability. Printer behaviour can vary significantly between manufacturers and models.
- Maintenance: Keep in mind that printers require maintenance. Regularly check printer supplies like ink or toner and paper. Implement a maintenance schedule to ensure the printer’s functionality.
Summary
In summary, while the code provided is a good starting point, there are additional considerations for reliability and handling printer-specific issues. Protocols, error handling, status checking, queuing, and testing are essential aspects to address. Moreover, you may need to explore printer-specific documentation to ensure compatibility with your specific printer model and handle it’s unique features accordingly.